Installation
Installing phpaga is not a fully automated process, there are a few simple steps that you must go through. If you are upgrading from a previous version you might be interested in the chapter Upgrade.
For a fresh install you need to do the following steps:
- Copy phpaga files to the destination folder(s).
- Install the requirements.
- Create a database and grant the necessary rights to the phpaga user.
- Set some base configuration parameters.
- Point your browser to phpaga - an installer will create the necessary tables and populate them with the core data.
This document will guide you through the installation and give you some help. If you don’t know how to install PHP or how to compile it with support for the packages listed under “requirements”, then refer to the PHP website and the official PHP Documentation.
Requirements
The following software packages have to be installed on your server in order to use phpaga. The version numbers mentioned below are known to work. Refer to each package’s website for installation instructions.
RDBMS
Currently PostgreSQL (>= 7.4) and MySQL (>= 4.1.16) are supported. If you are unsure about which to pick go for PostgreSQL - phpaga is developed and tested under PostgreSQL, and database-related parts are better tested with that platform.
Web server
phpaga should work with any PHP-enabled web server. The development environment is running nginx with PHP as FastCGI. phpaga has also been tested with Apache.
PHP with PDO
>= 5.2.0
PHP with support for PDO and the PDO driver(s) for PostgreSQL (or MySQL), gettext and gd. Visit http://www.php.net/ for more information on how to compile and install PHP, and http://www.php.net/gettext for information about PHP’s gettext support. For the various supported languages to actually work, make sure you have the corresponding locales installed. Keep in mind that after installing a new locale you will need to restart the web server.
The php.ini settings register_globals and magic_quotes_gpc can both be Off. In case magic_quotes_gpc is On all escaping slashes in $_REQUEST, $_GET and $_POST will automatically be removed by phpaga.
The amount of memory available to PHP is defined by the memory_limit setting in php.ini. This value defaults to 8M, but you might need to raise it to 16M or 32M if you encounter error messages like the following:
"Fatal error: Allowed memory size of 8388608 bytes exhausted (tried to
allocate 65211 bytes) in <some filename> on line <some line number>".
etc/config.local.php also provides the possibility to change this setting.
Graphviz
This package is optional. If you would like to see project relationship graphs you will need to install Graphviz and set the related option “Enable Graphviz” under the sitewide configuration to “Yes”. Note that phpaga will work nicely without this package (provided you set the option “Enable Graphviz” to “No”) - you will just be missing the relationship graphs.
ImageMagick
ImageMagick‘s convert is used to create preview thumbnails for uploaded files.
Installation
Installation layout
Only phpaga’s htdocs/ directory needs to be read by the web server. All other directories can and should be outside the web server’s document root. This can be achieved either by creating a virtual host and have its document root point to the full path to htdocs/, or by installing phpaga completely outside the document root of an existing website and then adding an alias to the web server’s configuration. This can be done under Apache with the following example:
Alias /phpaga /usr/local/phpaga/htdocs/
If you can’t modify the web server’s settings (for example because you are using the services of a webhosting company) you should use the following strategy:
Say your home directory is /home/exampleuser, and all your website content is stored under /home/exampleuser/www/, and you have unpacked the phpaga files to /home/exampleuser/phpaga/. Do this:
mv /home/exampleuser/phpaga/htdocs/* /home/exampleuser/www/
mv /home/exampleuser/phpaga/htdocs/.htaccess /home/exampleuser/www/
edit /home/exampleuser/www/config.php to point to /home/exampleuser/phpaga/etc/config.php, i.e.
require_once '../phpaga/etc/config.php';
If you want the phpaga setup to be accessible using a subfolder of your domain, i.e. www.example.com/phpaga, then do this instead:
mv /home/exampleuser/phpaga/htdocs /home/exampleuser/www/phpaga
edit /home/exampleuser/www/phpaga/config.php to point to /home/exampleuser/phpaga/etc/config.php, i.e.
require_once '../../phpaga/etc/config.php';
The database
Create a database and a database user with the necessary permissions and set the appropriate configuration settings in the file etc/config.local.php accordingly. Make sure the database is able to hold unicode/utf-8. We will name both the database and the user “phpaga” in the examples provided below.
If you are using phpaga with a webhosting provider, chances are that the provider will create the database for you and give you the credentials.
If you are upgrading from a previous version of phpaga refer to the section Upgrade. For information about converting from MySQL to PostgreSQL read the section Migrating phpaga from MySql to PostgreSQL.
For PostgreSQL
Note: If you are using PostgreSQL 8.x, use ‘UTF8’ as the encoding of the database. For PostgreSQL 7.x, use the encoding ‘UNICODE’.
psql template1
template1> create database phpaga with encoding 'UTF8';
template1> create user phpaga password 'yourpasswd';
template1> grant all on database phpaga to phpaga;
Depending on your setup, you may also need to modify pg_hba.conf. This file is part of PostgreSQL and controls which hosts are allowed to connect, how clients are authenticated, which PostgreSQL user names they can use, which databases they can access. Refer to the PostgreSQL documentation if you are unsure about the proper settings.
For MySQL
Note: In order to work with database transactions, the InnoDB Storage Engine is used. To determine whether your server supports InnoDB use the SHOW ENGINES statement.
mysql -uroot -p mysql
mysql> create database phpaga default character set utf8 collate utf8_general_ci;
mysql> grant all on phpaga.* to phpaga@localhost identified by 'yourpasswd';
mysql> flush privileges;
Configuration
Fire up your browser of choice and point it to the right URL. A simple wizard will guide you and help you to create the database structure, populate it with core data, and create the first user.
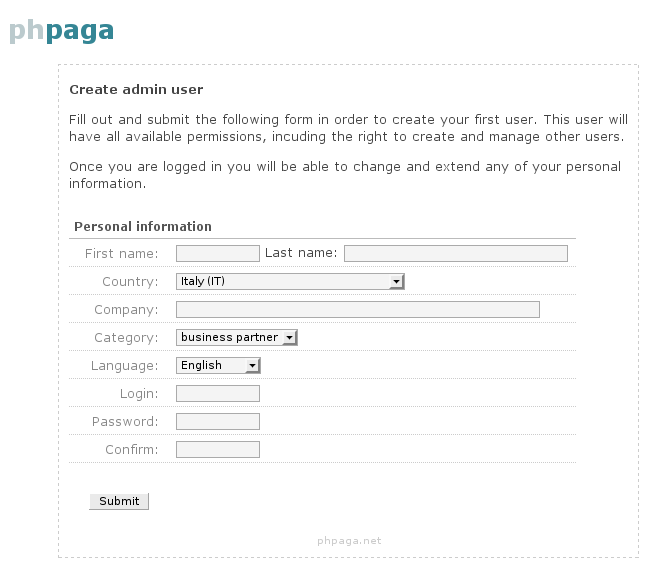
Insert the data as required and submit the form. The user will be created with all available permissions, and you are invited to log in.
In case you have any problems accessing phpaga, try to open test.php in your browser and check its output for helpful information.
PLEASE NOTE: If you can log in and everything is running smoothly, remove htdocs/test.php (or chmod it so that the webserver does not have access to it) - it might expose critical information.
Once you are logged in you can configure the default settings by selecting “Sitewide settings” from the admin menu.
From there you have the option to manage your categorie sections (task/project/job and other categories) from the admin menu, before you (or your users) start to add tasks.
Development version
The following information is not needed if you install phpaga from an official (release) package.
If you fetched the source directly from phpaga’s subversion repository you will need to install a few extra libraries (they come already bundled with official phpaga packages) and perform some additional installation steps.
Additional requirements
Additional installation steps
If you fetched the source directly from phpaga’s subversion repository you will need to perform the following steps. If you are installing an official package you can skip this section.
Use the sample file etc/config.local.php_sample to create etc/config.local.php and fill in the necessary parameters.
Give the web server full permissions to the files/ directory. This directory will contain the files users can upload and associate to objects (project, person, company, ...).
chown www-data files/
chmod 0700 files/
If you do not have administrative rights on the server and therefore cannot change the directory’s ownership, simply chmod 0777 the directory.
chmod 0777 files/
Make sure your phpaga directory contains a templates_c directory which the web server can write into. If you have root access:
cd /data/webs/phpaga/
mkdir -p templates_c
chown www-data templates_c
chmod 700 templates_c
or, if you are using shared hosting:
cd /home/exampleuser/phpaga/
mkdir -p templates_c
chmod 777 templates_c
Install required 3rd party packages
If you have Smarty already installed on your server you can use it by editing the definition of SMARTY_DIR in etc/config.local.php accordingly.
define("SMARTY_DIR", "/some/other/path/to/smarty/libs/");
Otherwise install Smarty into ext/ (no need to change etc/config.local.php).
[ cd phpaga/ext ]
tar zxf Smarty-x.x.x.tar.gz
mv Smarty-x.x.x smarty
Install TCPDF
[ cd ext/ ]
unzip tcpdf_5_9_034.zip